
3 Tips + Templates for Agile Process Documentation
Every retrospective needs to be documented in some form. That’s why I’m providing you with the template I use to document retrospectives with my team. This shows how I document things during the retrospective and then how I record the results of my retrospective at the end, so that you can still use it for yourself in the future.

Templates for agile process documentation
A brief overview of a retrospective:
Before we discuss how I document my retrospectives, I would like to give you a brief overview of what a typical retro agenda looks like. After that, we can dive deeper into the individual points of the agenda and look at how to document them correctly. If you would like to learn more about my ideal template for a retro agenda, read this article: “Easy to Use Sprint Retrospective Agenda Template”
The Agenda of a Retro:
1. Retro Checkin: Here, all team members are shaken up once and everyone is included in the retro check once.
2. Action Item Review: In the second step, all action items from the previous sprint are subjected to a short review: Done-Continue-Discard.
3. collecting data: If you haven’t already, all team members can answer the retrospective questions now to talk about later. (If you want to take a look at more than 50+ retrospective templates, click this link).
4. Analyze + Create Action Items: Now take a closer look at the answers to the questions and prioritize them. For the most important questions, you usually develop action items to work on.

Templates for agile process documentation
What needs to be documented in an agile retrospective?
Now that we’ve seen what the key building blocks of retrospective are, we can look at what needs to be documented and how.
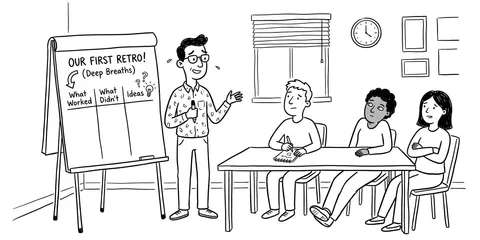
1. Retro Check-in: The check-in serves to get the retrospective started. However, it is not important for the rest of the retrospective. Here, it is usually fine to use just a simple whiteboard, post-its, or no documentation at all. You can find check-in or icebreaker ideas in this article: “21 Creative Retrospective Check-ins That Will Break Any Ice “.
This is what a check-in might look like:

2. Review Of The Action Items: In this step, you have usually already documented the relevant action items in the last retrospective, so you can review them now. I personally use our Echometer software for this. However, if you want to do this yourself, I suggest doing it on a canban lane so you can easily see the status of the action.
Usually it is good to talk about these points and clarify if there are any obstacles, if the action point can be done in a short time. In some cases it is also advisable to discard the action item. Don’t hold on too tightly to action items if new information shows that it is not worth investing further time here. Also, be careful with a large product backlog. Although this is a popular mechanism for moving items into the future, the product backlog takes the effectiveness out of agile work.

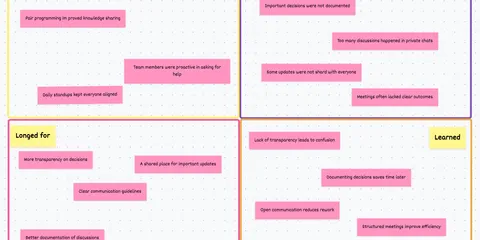
3. collect data: Normally, one arranges the various retrospective questions in columns to which team members can attach their answers. This is usually done in the form of post-its or similar.
Here you have a good overview of all the points to be discussed.
Expert Tip: Have all participants submit their answers to the retro questions a few hours before the retrospective begins. This way, participants will be more thoughtful and open about their points of view.
With Echometer, you can send a simple survey to all participants with the click of a mouse before starting a retrospective.

4. Evaluate + Create Action Items: In the last step, you should leave only the post-its on the whiteboard that you really want to talk about in more detail. You can find out which post-its they are by giving all participants a few choice votes to assign to the post-its.
When you discuss the individual points in more detail, you can even open a new whiteboard to take notes or get a better structure of the things you are discussing. Once you have found common ground and create action items from your most important retro points, it is important that you save them for later so that you can review them in the upcoming retro, as in “Step 2 - Reviewing Action Items”.
Retrospective Idea WentWell: How the retro works
Random Icebreaker (2-5 minutes)
Echometer provides you with a generator for random check-in questions.
Review of open actions (2-5 minutes)
Before starting with new topics, you should talk about what has become of the measures from past retrospectives to check their effectiveness. Echometer automatically lists all open action items from past retros.
Discuss retro topics
Use the following open questions to collect your most important findings. First, everyone does it themselves, covered. Echometer allows you to reveal each column of the retro board individually in order to then present and group the feedback.
- What went well?
- What went not so well?
- How can we improve?
Catch-all question (Recommended)
So that other topics also have a place:
- What else would you like to talk about in the retro?
Prioritization / Voting (5 minutes)
On the retro board in Echometer, you can easily prioritize the feedback with voting. The voting is of course anonymous.
Define actions (10-20 minutes)
You can create a linked action via the plus symbol on a feedback. Not sure which measure would be the right one? Then open a whiteboard on the topic via the plus symbol instead to brainstorm root causes and possible measures.
Checkout / Closing (5 minutes)
Echometer enables you to collect anonymous feedback from the team on how helpful the retro was. This creates the ROTI score ("Return On Time Invested"), which you can track over time.
Retrospective Idea WentWell

Templates for agile process documentation
Retrospective Results Document:
Documenting retro results is an important part of the agile process. It helps teams track their progress, identify areas for improvement, and ensure that actions are followed up. One tool that can help with this is Echometer.
Echometer offers several features that can help teams document their retro results. One of them is the Automated Retro Summaries, which allows teams to store and retrieve past retrospectives. This can be useful for tracking progress over time and identifying patterns or recurring issues.
Another useful function are the Health Check Dashboards. These dashboards give teams an overview of their performance and can help identify areas for improvement. Teams can use these dashboards to track their progress and ensure they are meeting their goals.
Finally, Echometer also offers a Action Item Tracking, which teams can use to track the actions resulting from the retrospectives. This ensures that these points are followed up and progress is made.
Overall, Echometer provides teams with a set of tools to document the results of their retrospectives and track their progress.
If you are interested in improving your documentation, you should definitely try it out! 😊